
Elastic Search 2
Elastic Cluster
VM Settings
실제로 VM을 추가로 생성해서 cluster을 구성해보자
GCP를 활용하여 기존에 생성한 Server에 대한 머신 이미지를 생성해서 이를 토대로 인스턴스를 생성하면 기존의 환경을 그대로 복제한 서버를 생성하는 것이 가능하다.
VM 인스턴스를 생성하고 나면 아래와 같이 host 파일을 구성한다.
/etc/hosts
#Elastic Cluster
10.178.0.2      elastic1
10.178.0.3      elastic2
10.178.0.4      elastic3
추가적으로, vm 간에 내부 통신을 위해서 방화벽을 설정하여 elastic-internal tag을 가진 vm 간에는 9200,9300 포트를 개방하도록 한다.

Cluster settings
각각의 노드에 대해 config/elasticsearch.yml을 수정하여, node, cluster 정보를 설정한다.
/config/elasticsearch.yml
cluster.name: "es-cluster-1"
node.name: "node-1"
#set cluster ip by vm ip
network.host: ["_local_","_site_"]
#configuring host list for cluster
discovery.seed_hosts: ["elastic1","elastic2","elastic3"]
cluster.initial_master_nodes: ["node-1","node-2","node-3"]
results
이후, 다른 node에 대해 접속을 시도하면 아래와 같이 응답이 돌아오는 것을 확인할 수 있다.
{
  "name" : "node-2",
  "cluster_name" : "es-cluster-1",
  "cluster_uuid" : "vtMbST2-T3icSoQ1Uv_Wtw",
  "version" : {
    "number" : "8.4.3",
    "build_flavor" : "default",
    "build_type" : "tar",
    "build_hash" : "42f05b9372a9a4a470db3b52817899b99a76ee73",
    "build_date" : "2022-10-04T07:17:24.662462378Z",
    "build_snapshot" : false,
    "lucene_version" : "9.3.0",
    "minimum_wire_compatibility_version" : "7.17.0",
    "minimum_index_compatibility_version" : "7.0.0"
  },
  "tagline" : "You Know, for Search"
}
/_cat/nodes?v 옵션을 활용하게 되면 해당 cluster에 binding 된 node 정보를 확인할 수 있다.
ip         heap.percent ram.percent cpu load_1m load_5m load_15m node.role   master name
10.178.0.2           26          95   0    0.33    0.47     0.28 cdfhilmrstw -      node-1
10.178.0.4           10          80   0    0.04    0.32     0.20 cdfhilmrstw -      node-3
10.178.0.3           12          80   0    0.01    0.14     0.14 cdfhilmrstw *      node-2
Security settings
TLS CA
elastic search에 대해서, 기존에는 로그인 없이 접근하는 것이 가능해, client에서는 아무런 인증 없이 데이터에 생성/수정이 자유로웠다. 하지만, 이는 심각한 보안 문제를 일으킬 수 있기 때문에, 보안 설정을 해야한다.
elasticsearch 8.0 에서는 기본적으로 TLS 기반의 암호화 과정을 거치지만, 이를 직접 적용해보았다.
- 공개키 생성
bin/elasticsearch-certutil ca
- 공개키에 대한 대칭키 생성
bin/elasticsearch-certutil cert \
--ca elastic-stack-ca.p12 \
--dns elastic1, elastic2, elastic3 \
--ip 10.178.0.2,10.178.0.3,10.178.0.4 \
--out config/certs/es-cluster.p12
- elastic cluter 환경설정 수정
config/elasticsearch.yml
# Enable security features
xpack.security.enabled: true

xpack.security.transport.ssl:
  enabled: true
  verification_mode: certificate
  keystore.path: certs/es-cluster.p12
  truststore.path: certs/es-cluster.p12
- keystore에 password을 등록해줘야한다.
대칭키 파일에 대해서 암호화 되어 있기 때문에, 비밀번호를 저장해둬야한다.
비밀번호의 경우, 외부에 노출이 되어서는 안되기 때문에 elastic-search의 keystore에 안전하게 보관할 수 있도록 한다.
./bin/elasticsearch-keystore add xpack.security.transport.ssl.keystore.secure_password
./bin/elasticsearch-keystore add  xpack.security.transport.ssl.truststore.secure_password
- 위의 과정을 통해 생성한 인증서를 cluster을 구성하는 노드에 복사를 하고, 3번의 환경 설정 작업을 진행해준다.
User password
위의 인증서 생성 작업을 마무리한 후, 아래의 메세지가 뜨게 되는데, 이는 authentication 과정이 없기 때문이다.
{"error":{"root_cause":[{"type":"security_exception","reason":"missing authentication credentials for REST request [/]","header":{"WWW-Authenticate":["Basic realm=\"security\" charset=\"UTF-8\"","ApiKey"]}}],"type":"security_exception","reason":"missing authentication credentials for REST request [/]","header":{"WWW-Authenticate":["Basic realm=\"security\" charset=\"UTF-8\"","ApiKey"]}},"status":401}
요청을 수행할 때, 반드시 user:password을 명시해야한다.
system user
#auto: 자동 패스워드 생성
#interactive: 수동 패스워드 부여
./bin/elasticsearch-setup-passwords
위의 명령어를 통해 생성된 주요 계정들에 대한 정보는 모든 노드에서 사용되는 것으로, 한번 정의하면 다른 노드에서도 활용이 가능하다.
normal user
./bin/elasticsearch-users useradd {user} -p {password} -r role {}
반면, 위와 같이 일반 유저에 대해서는 해당 노드에 대해서만 저장되므로, 다른 노드에는 저장되지 않는다.
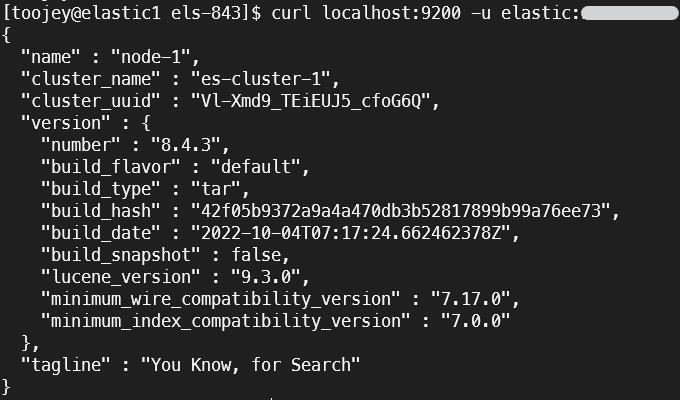
주로 사용하게 될, elastic user에 대해, interactive 방식으로 패스워드를 지정한 후, 아래와 같이 요청을 시도했을 때 정상적으로 응답이 오는 것을 확인할 수 있다.
댓글남기기